This article details how to create payments using the Virtual Terminal. The Virtual Terminal enables you to charge any credit or debit card directly from the Finix Dashboard.
Step 1: Create a Payment
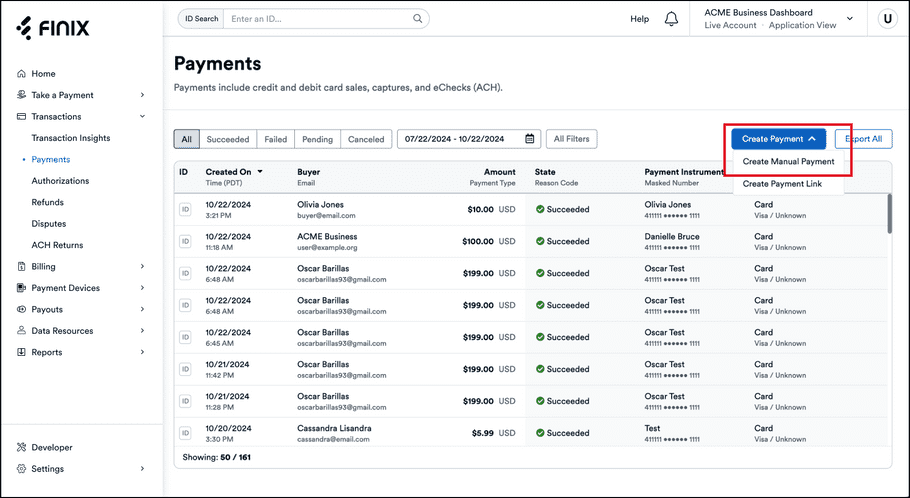
To access the Virtual Terminal and manually create a payment:
- Log in to the Finix Dashboard.
- Click Transactions > Payments.
- Click Create Payment.
Step 2: Enter Payment Details
After clicking Create Payment, you'll see the Virtual Terminal form.
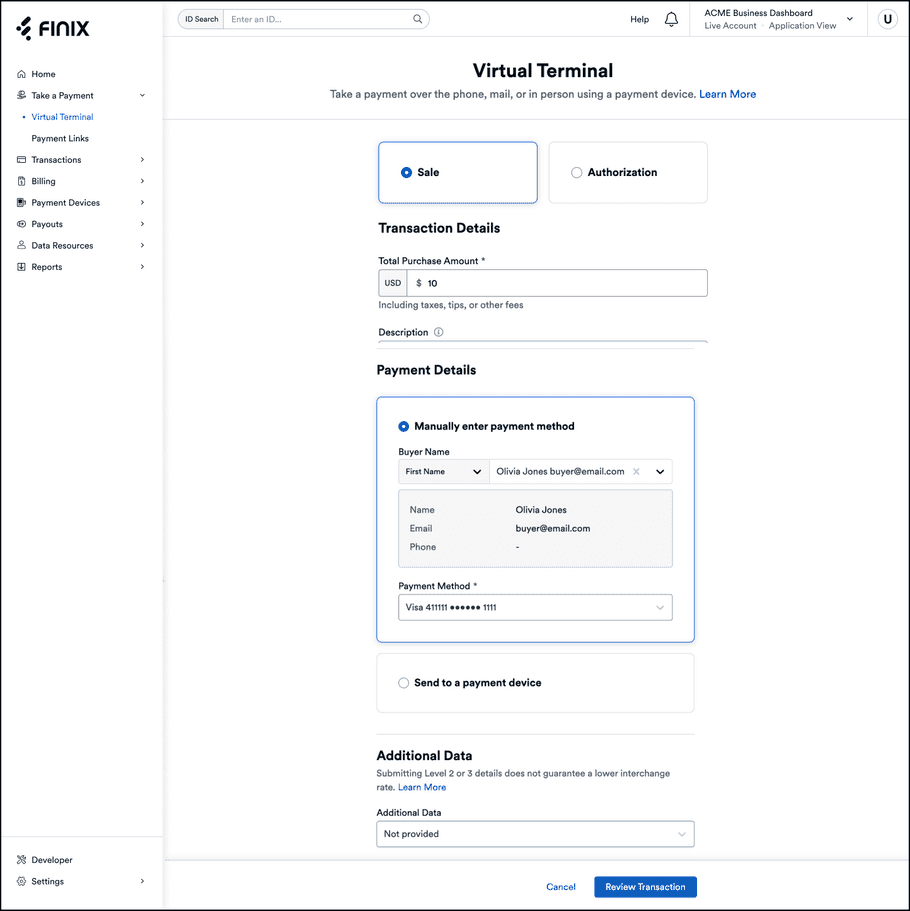
Entering payment details into the form is designed to be intuitive and straightforward. We recommend filling out every field in the Create a Payment form to make the payment easier to search for:
- Start by entering the Total Purchase Amount; the amount entered gets charged to the buyer's debit or credit card.
- In Description, enter any additional information, like order numbers or invoice details, that will help you easily reference the transaction later.
- Choose the Buyer. Click Add New Buyer if you don't see the buyer's details.
- Choose the Payment Method to charge. Only the first six digits and last 4 four of the card number will be visible. Click Add a new payment method if you don't see the last 4 digits of the buyer's card.
- Click Review Payment.
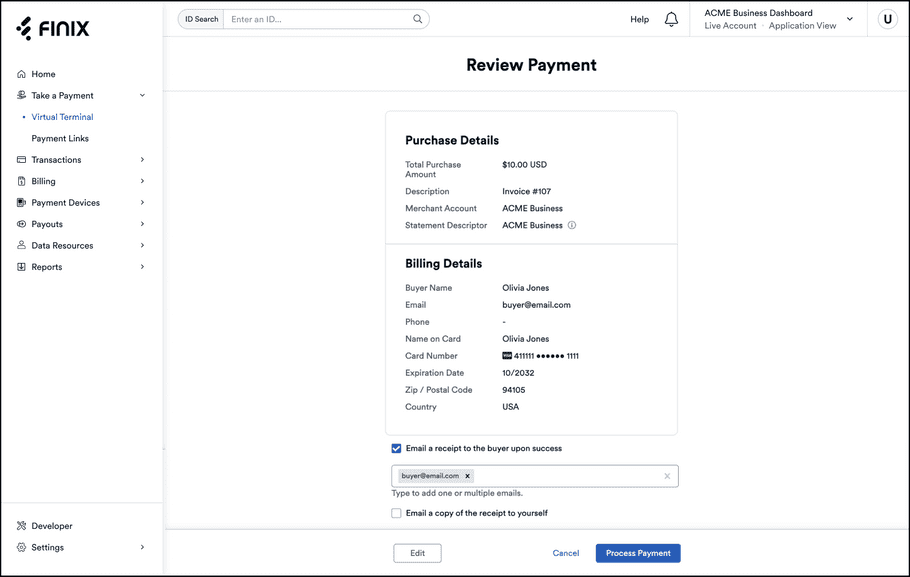
Review the Purchase Details and Payment Details to ensure the transaction gets processed alongside expectations. When you're ready, click Process Payment.
Step 3: Payment Confirmation
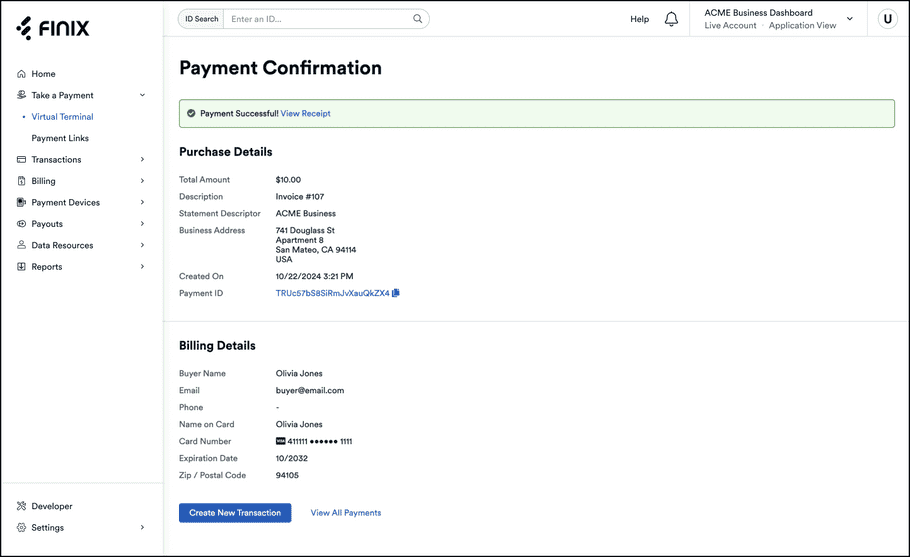
Once you've submitted the payment, a confirmation message will appear confirming that the payment was initiated.
- A Payment ID gets returned to help you track the status of the payment. The Payment ID is taken from the
Transfercreated to debit funds from the buyer. - Click Print Confirmation to print the Payment Confirmation page to provide your buyer with a receipt.
Step 4: Managing Payments
Click on the Payment ID to review the payment in detail, update the Description, or create a refund.
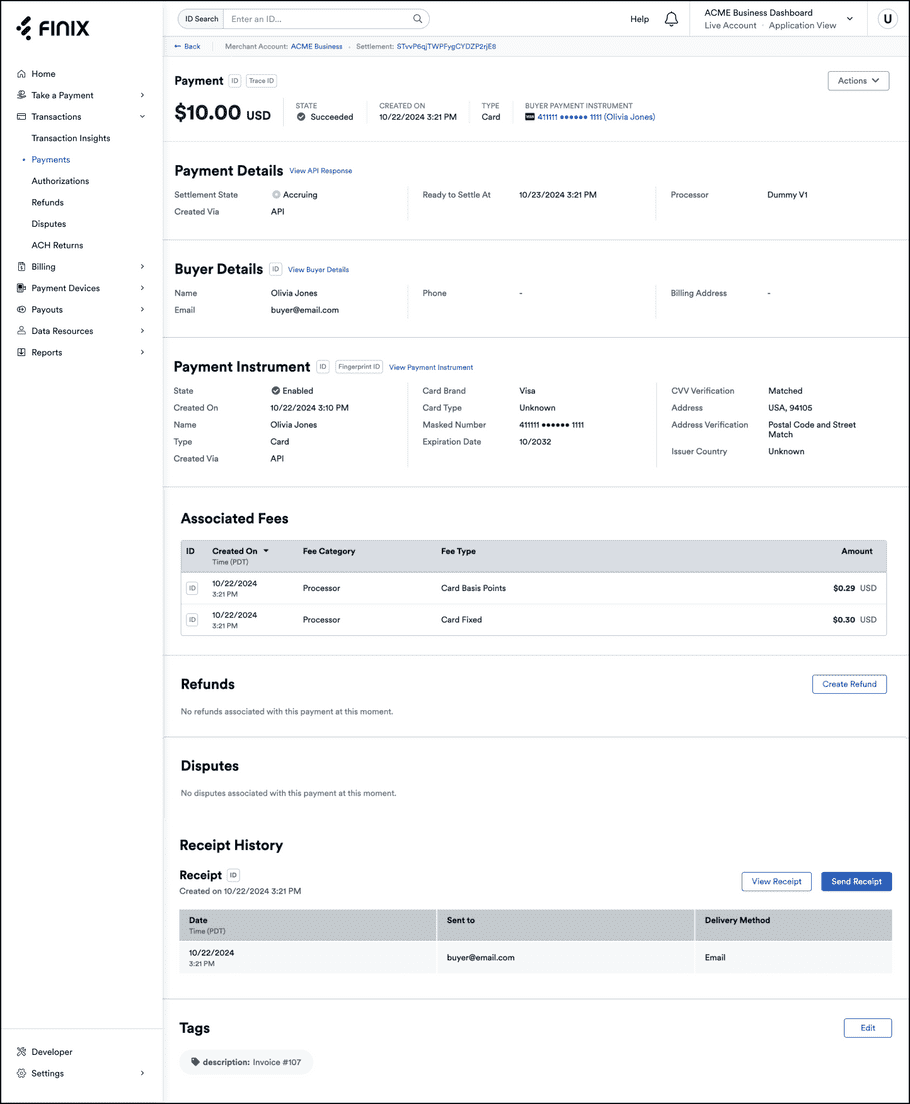
You can also use the tools available on the Payments page in the sidebar to search and retrieve past transactions.